How a Mid Taper Fade Is Done: Step-by-Step Barbering Guide
Curious about the process? See how barbers fade the hair from ear level, blend the neckline, and connect the top. Great for students and home barbers.
The "Behind the Scenes"
Whether you are an aspiring barber or just curious why your haircut takes 45 minutes, understanding the mechanics of a mid taper fade helps you appreciate the craft (and spot a bad haircut before it's too late).
This isn't a DIY guide—please go to a professional. But here is the process.
Don't risk a DIY fail Preview first →
Step 1: The Guideline (The "Mid" Part)
The barber creates the first bald line (if doing a skin taper) or shortest guideline right at the top of the ear. This sets the "Mid" height.
- Low Taper would be below the ear.
- High Taper would be at the temple.
Step 2: Clearing the Bulk
Using a #3 or #4 guard, the barber clears the hair above the ear to connect the sides to the top. This creates the "canvas" for fading.
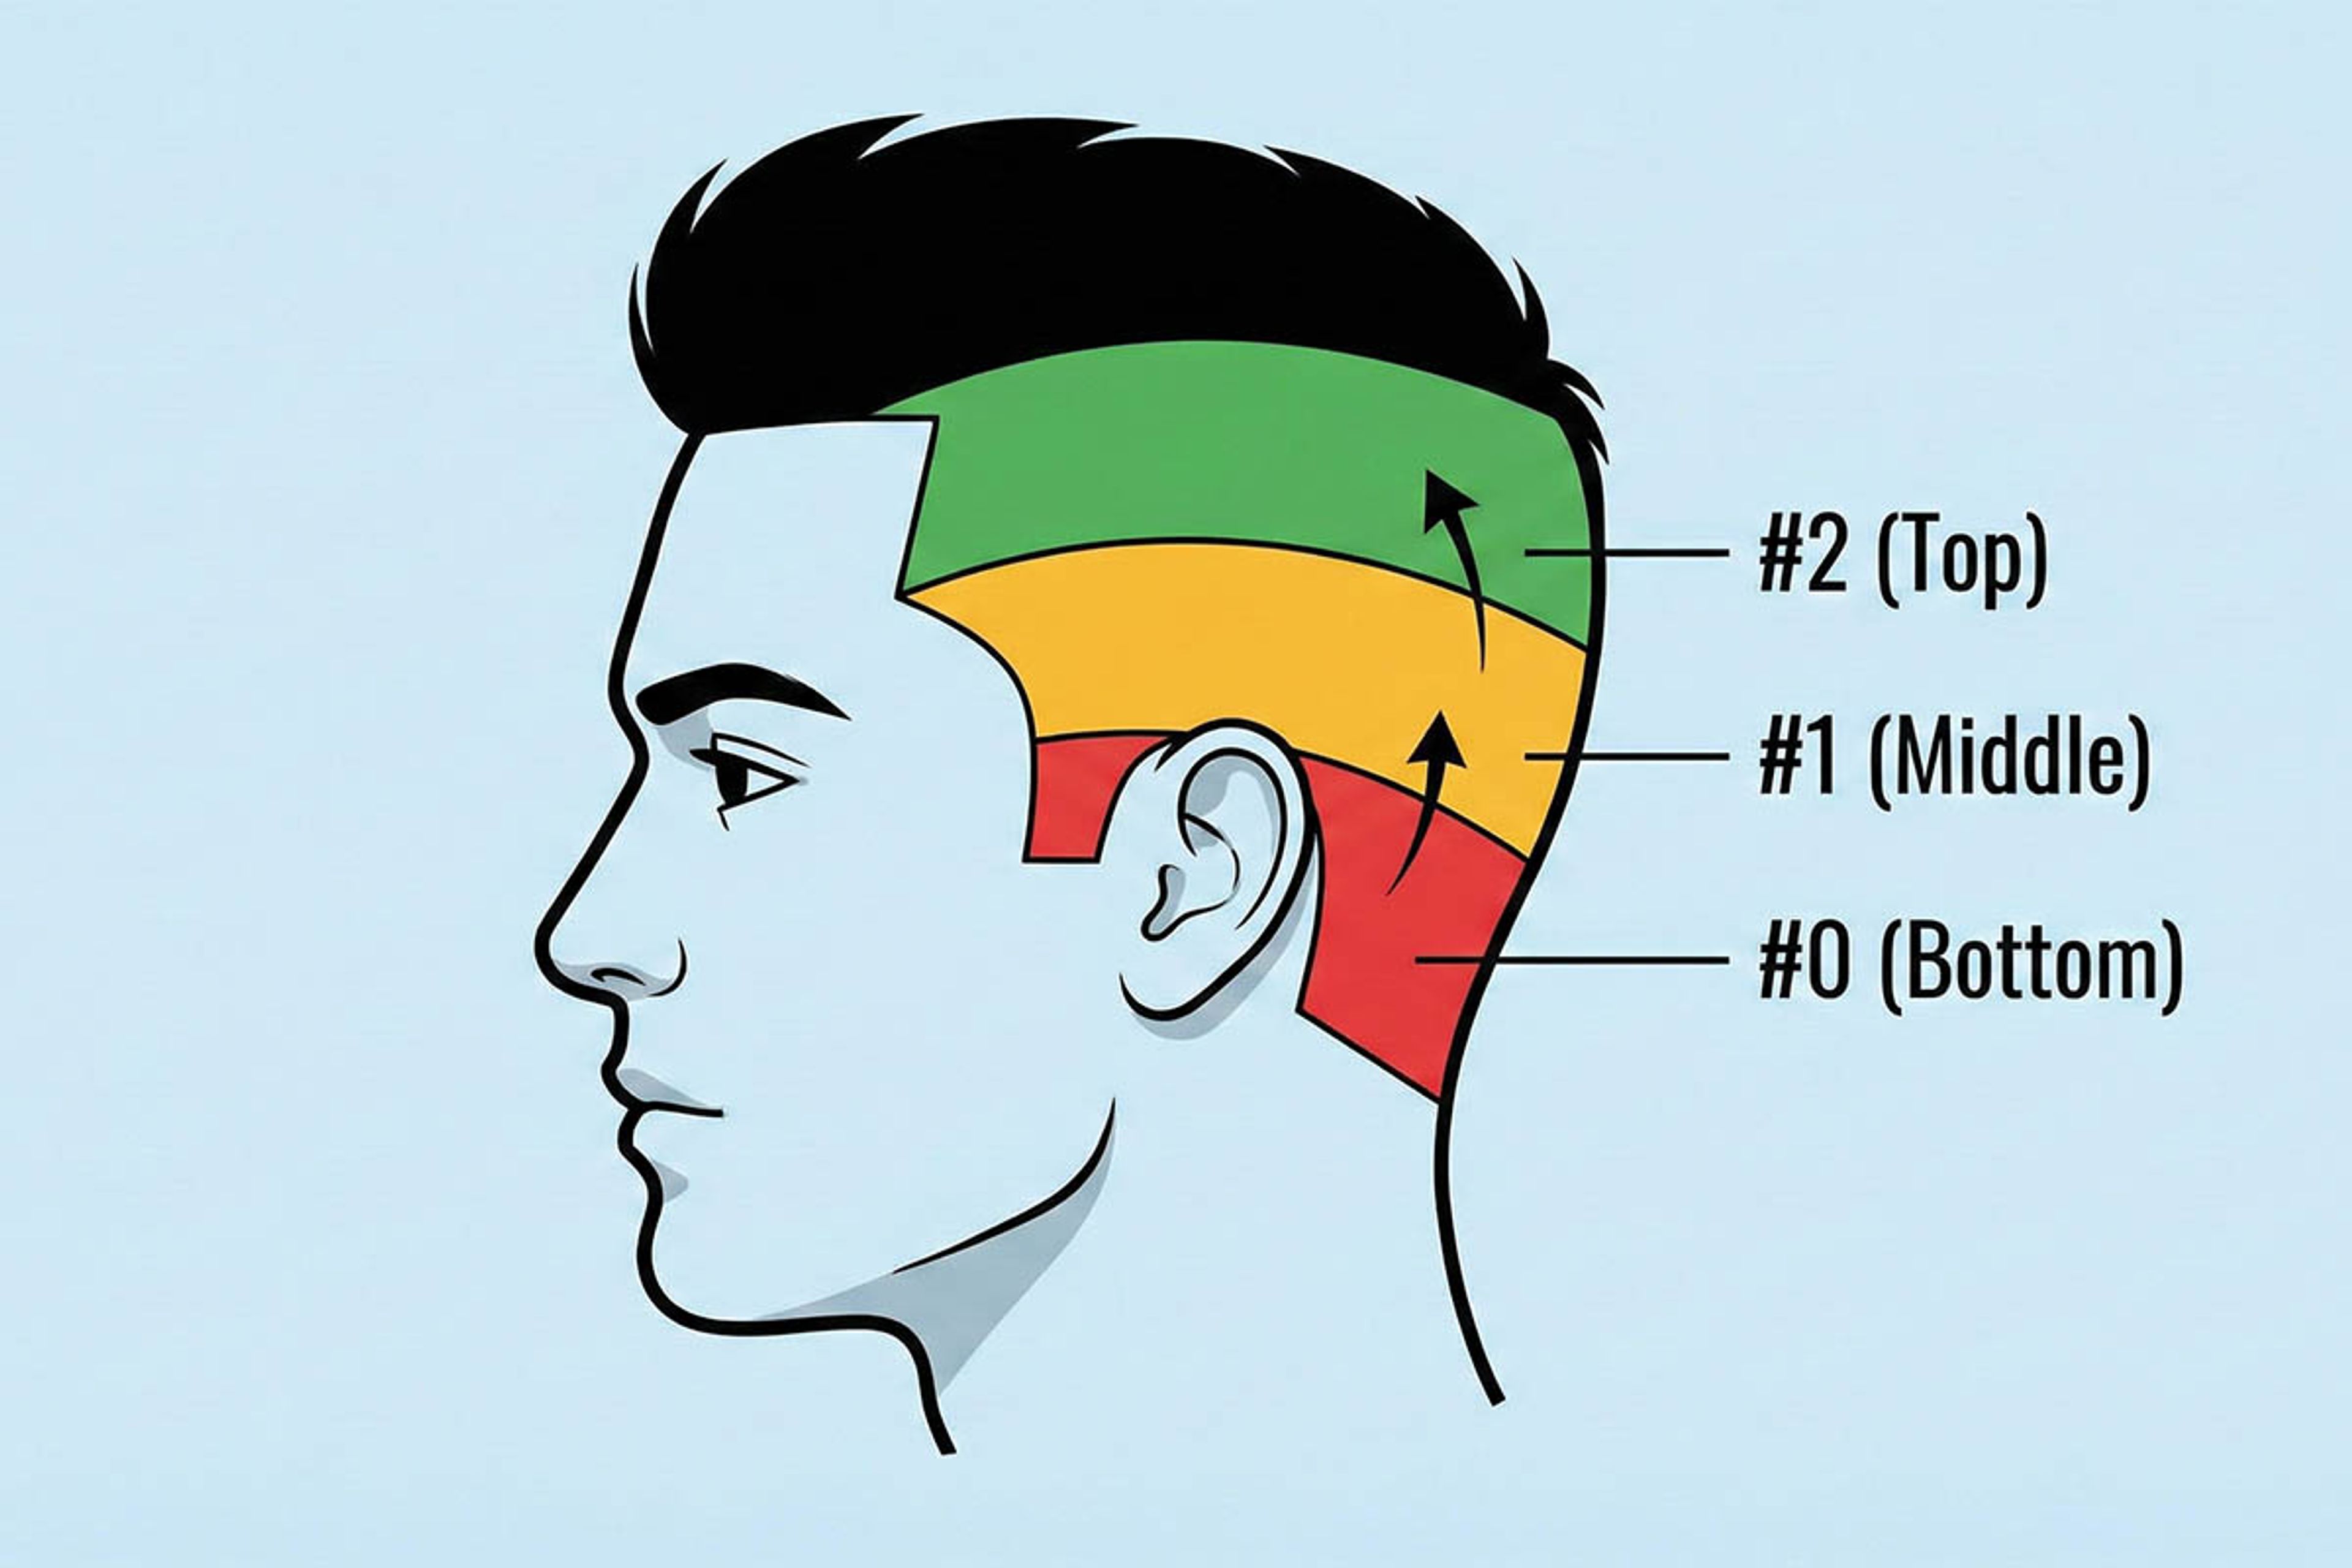
Step 3: The Fade (Blurring lines)
This is the magic. The barber moves down in guard sizes:
- Open lever (no guard) to creating a section.
- #1 Guard to blend into the bulk.
- #0.5 Guard to erase the middle line.
- Trimmer to clean the bottom.